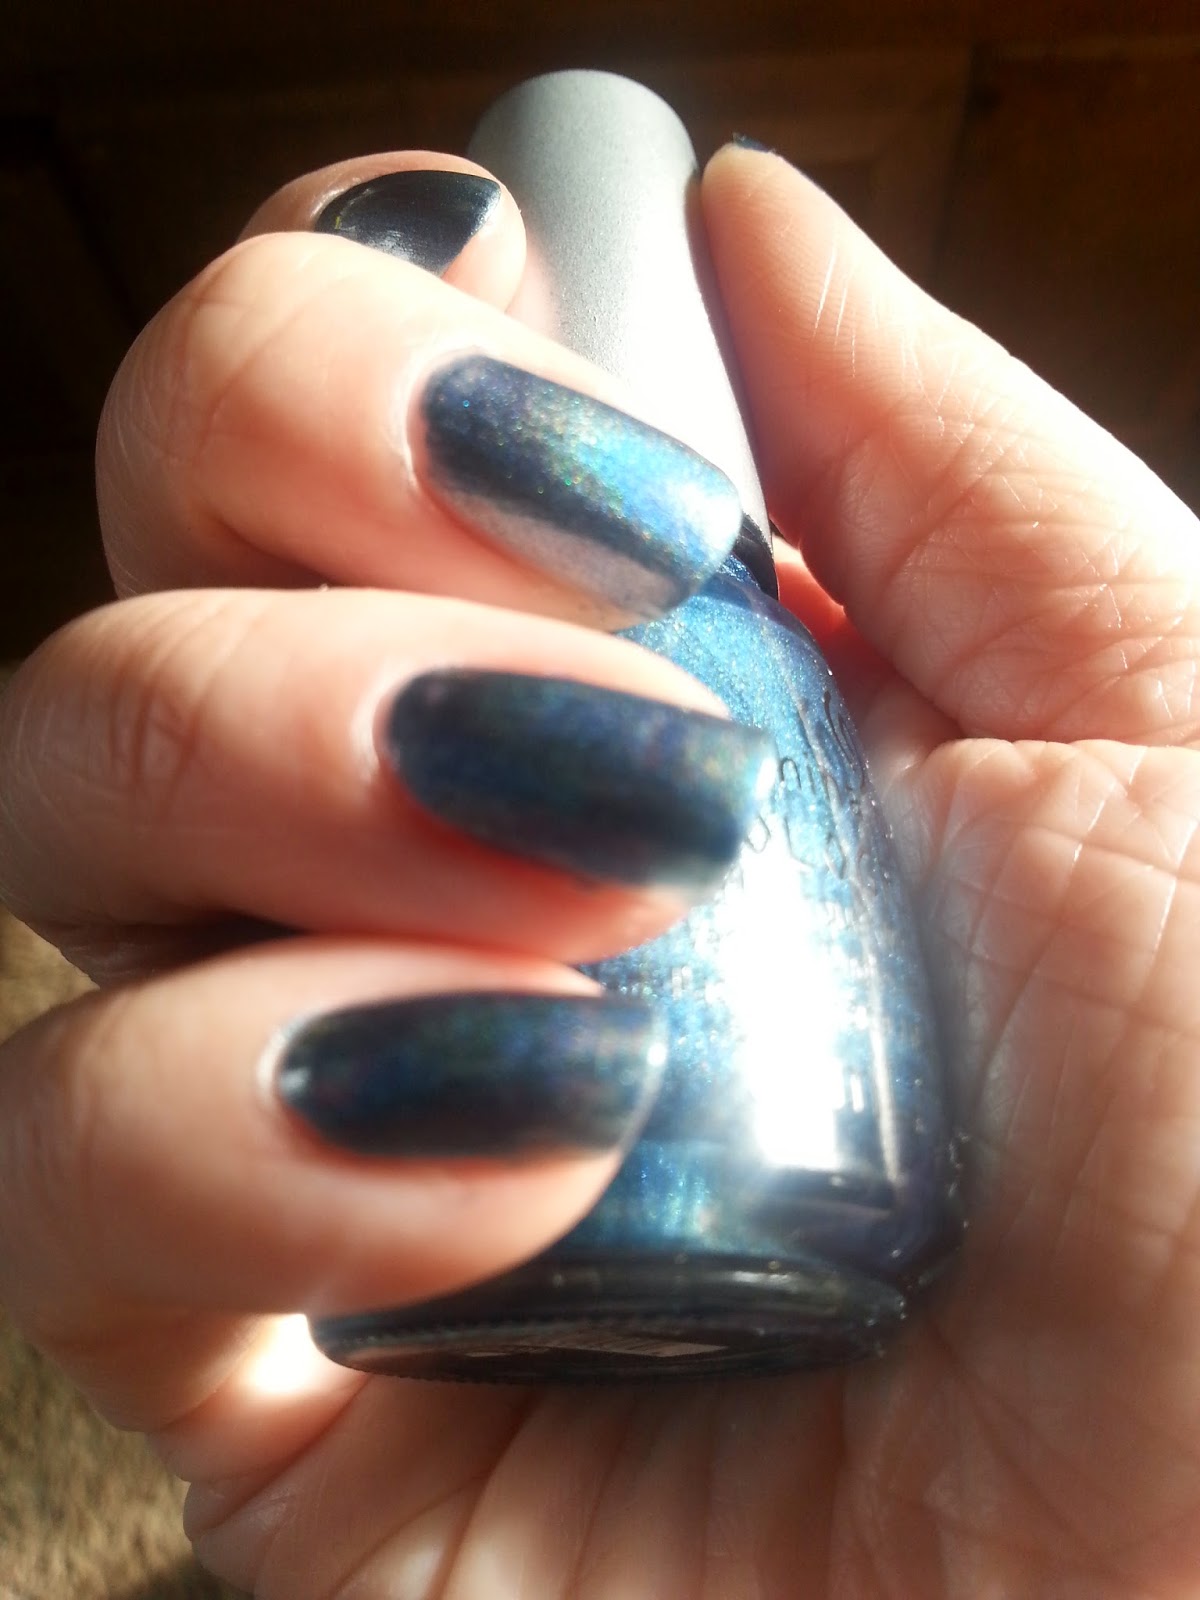
WOW WOW WOW! I only bought this polish recently when my friend said she wanted some holographic polishes and recommended China Glaze's. I myself had never tried them but the pictures I'd seen were truly stunning! I made my decision and ended up buying one- even though I wanted more, the others I wanted were out of stock though, much to my disappointment. I bought Take a Trek as that was my second favourite to Strap On Your Moonboots and I'm SO glad that I did.
This polish is an absolutely beautiful blue colour that creates a little rainbow of sparkle on your nail when a bright (preferably natural) light hits it. I cannot describe how beautiful this colour is so you will just have to see for yourself! Regarding formula and application, both are great! This polish only takes 2 thin coats to become pretty much fully opaque and it is so smooth to apply. It dries very quickly too which is always a bonus. The one thing I have found with this polish so far- and it's early days yet- is that it chips pretty easily even with a topcoat. Because I have only used this polish once so far I'm not sure whether it's the top coat I'm using (Essence Quick Dry) or the China Glaze itself. So hopefully I'll find out more when I wear it again. But overall this polish is absolutely stunning and I will definitely buy the other colours I like when they come back in stock!
Wednesday, 18 March 2015
Wednesday, 11 March 2015
NOTW 17: Mothers Day Nails
It's Mothering Sunday this week. A day when we spoil our moms with gifts and nice gestures! I thought it would be a good idea to do a nail design for this special day by doing something that reminds me of all things motherly! I decided to use delicate pinks and do a few different patterns and I'm really pleased with how they turned out!
I used Sinful Colors Soul Mate as the base colour for my ring finger and the stripes in the other nails. I used another Sinful Colors polish for the heart and the rose design (well, what's SUPPOSED to be a rose design...), called Dancing Nails. The colour I used as a base for my middle finger and the main colour on the striped nails was an unnamed colour from the brand Lumiere but I have found that this brands polishes are actually quite good for their price. I think all of the colours really work well together and I think the roses on the ring finger are very subtle and just catch the light in the right way, It turned out really well and I might try this colour combination in another design.
To me, this is a great idea for Mothers Day as it isn't an in your face design that is obviously related to the day, but it can still be asssociated with the day! I believe that these designs could work as just a general spring/summer manicure too, either separately or just like this!
Wednesday, 4 March 2015
NOTW 16: Lacey Bahama Mama
One of my best friends bought me Essie's Bahama Mama for Christmas which is a beautiful berry, wine-like colour. I think this is a colour that works all throughout the year and one idea I was really excited to try was a base of Bahama Mama and a white design on top. I had a look through the stamps I have and thought that this flower design would be a great choice as it looks pretty, interesting and elegant! I also thought it would work quite well with the white and I wasn't disappointed!
The polish itself (Bahama Mama) applies so evenly and has great pigment. It only took 2 thin coats to become opaque but more coats would also change the colour slightly, so it's a really versatile polish! It dried pretty quickly too which is a benefit! The stamps I used (Cheeky Stamps) applied evenly too but I do think I need to invest in a proper white stamping polish or use an alternative white as the Barry M one I used just didn't turn out as white as I'd hoped. The overall design was still visible and looked good though so I'm not too disappointed! I also used my Essence topcoat again and I still wasn't disappointed! I loved this design and think it would be a great design for many different occasions and the colour will work all throughout the year!
Saturday, 28 February 2015
Technic Bronze Palette First Impressions!
A few months ago (...last August, oops!) I reviewed Technic's Nudes eyeshadow palette and overall I really liked it (link here if you're interested). Today I have another one of their palettes and this one is their Bronze palette. Bronze shades really suit me as I have blue eyes and once again, Technic have not let me down!
Monday, 23 February 2015
NOTW 15: Pancake Nails!
I know it's a little late but I really wanted to do this nail design! I was so excited to try it out and I think it's come out pretty well. This weeks Nails of the Weeks are inspired by pancakes! I wanted to create a design that looked like pancakes with syrup or chocolate on and I really like the result!
I used the water marbling effect to create the swirls and this was the first time I'd tried this technique! It took a while to get everything right but overall I think it's great for a first attempt. The colours I used were Sally Hansen's 'Dune' (cream/nude) and Essie's 'Glamour Purse' (brown). I wanted to create a swirl pattern more than the normal pattern as I thought it would look more like syrup that has been poured on top. I love this design and I think I will be using this technique in the future now I know how to do it properly! I love the colours of the polish too; Dune is a pretty cream colour and Glamour Purse is a rich brown colour!
Thursday, 19 February 2015
W7 In the Buff: Lightly Toasted vs. MUA's Undressed palette. Naked Palette DUPES!
So if you saw a few of my last posts you would know that I recently bought a few palettes from W7 that are dupes for Urban Decay's Naked 1 + 2 palettes. Little did I know that I already had an original Naked Palette dupe from MUA (Makeup Acadamy). I thought it would be a good idea to test these palettes against each other as they are both around the same price, so... lets get into the post!
Friday, 13 February 2015
NOTW 14: Valentines Nails
I haven't done any Valentines Day nails before and I really want to start using calendar events as inspiration for my nails. So I did a generic heart design but I'm actually quite pleased with the result.
I used Nails Inc.'s St. James for my base and used my Cheeky stamps and Konad's black stamping polish for the design. The stamp is a really cool kind of doodle heart design and I thought it'd look great using a black polish. Looking on it, the design is pretty subtle as both of the colours are quite dark but it looks really nice when you can see the actual design. St. James is such a brilliant colour and a joy to apply! You actually only need one coat for it to become opaque but I still applied 2 to make sure. It's a lovely creamy, vibrant red colour and has such good lasting power!
For this design I actually struggled a bit with the stamps, I'm not sure if it was because the engraving wasn't deep enough or if I was doing something wrong. Either way I managed to fight my way through the dodgy application and create this design! I used my Essence top coat which dries amazingly quickly and does a great job of keeping the colour in place! It does tend to smudge the design a bit more than my Seche Vite one but I think I'll be able to find a way around that if I carry on using it! Overall I'm really happy with the design and think it's a great, simple design for Valentines Day.
Subscribe to:
Posts (Atom)