 The other day I wanted to make something, and I was also thinking about putting some pictures up to decorate my room. So I thought, why not put them both together and have a funky display in the end too! I decided to make these photo cubes with pictures of me and friends on all sides and I think they look really cool and add a great touch to a room! If you want to know how I made these then just keep on reading!
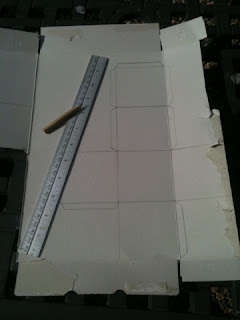
 I started off with just an empty cardboard box big enough to make a 7cm x 7cm cube. I then drew out the shape of my cube and added some tabs on so that I could glue the sides together. (You don't need to add tabs to every side as sides will join together!) I also used the fold of the box to make one of the folds on the cube to make it easier!
Once I had made sure all tabs and lengths were correct I cut out the box (very carefully!)
After cutting it out I added double-sided tape to each of the tabs (I personally would have used PVA or a glue gun... but I ran out! :S oops!). Don't remove the backing until all pieces are on. Then, once you're finished peel off one of the backings and stick it down, then peel another one off and so on. I did it this way as it stops all of the other pieces loosing their stickiness and getting in the way!

To smooth over the edges I decided to papier-mâché it so that the corners and all sides had no gaps. I used flour and water as my paste but PVA glue also works!
While they're drying have a nice cup of tea!

Once they've dried (I left mine for about 2 hours outside on a sunny day) paint them a colour of your choice!

While I was waiting for the paint to dry I chose which pictures I wanted and printed them off. Make sure they're the right size for the box! I think square pictures will look best with these however rectangular ones also work!
Once the paint has dried I stuck the pictures on in a way where 3 were facing one way and 3 were the other. (2 upside-down and 2 the right way up!)
And that's it! All finished! Put them where you like and they really make a room look more personalised! Thanks for reading and I hope this has inspired you to make something! Please visit my YouTube channel Darkeowl's YouTube Channel.


No comments:
Post a Comment